Introduction
Hardware development is a parts of where all the components that has been tested will be installed according to the wiring diagram that designed in the previous week. This week, all works that relate with this matter will be discussed and shown clearly.
Objective
- To install all the components related with the project.
- To wire the components according to the wiring diagram that designed.
All works that made is based on the project design and wiring diagram that has been implemented before. Thus, it does not give any problem either before, during or after do this activities. However, all the wire connection and components is ensured installed on the right connection and arranged properly.
Project Description
The installation and wiring for this project is made separately. The following is the procedures to install and wire all the components that used in this project.
Step 1
Each part of component is installed one by one and arranged properly according to the project design but before that a surface of plywood need to painted to look nice and tidy. In this project, the plywood is used as base where all the components will be mounted on this plywood. The Figure 1 below shows the plywood that have been painted with black colour.
Step 2
When the paint is completely dry, all the components will mounted on the painted plywood and arranged according to the project design. Below is the figure that shows the components that have been arranged and mounted on the plywood.
Step 3
After all the components completed mounted on the plywood, each part of component will be wired according to the wiring diagram and the result is such as Figure 3 below.
Step 4
Once all parts of electrical appliances is wired completely, a wiring job for the electronic part will be made. This part is made side by side to avoid any mistake in the wiring. Below is the figure that shows both parts of project that have been wired completely.
All parts of the hardware have been installed and wired based on the project design and wiring diagram that have been designed before. Thus, the results that obtained from this activities is such as the figure that shown in the Project Outcome below.
Project Outcome
As a conclusion, all works done smoothly. Thus, for the other work that relate with the software development will be made in the next progress report.
The installation and wiring for this project is made separately. The following is the procedures to install and wire all the components that used in this project.
Step 1
Each part of component is installed one by one and arranged properly according to the project design but before that a surface of plywood need to painted to look nice and tidy. In this project, the plywood is used as base where all the components will be mounted on this plywood. The Figure 1 below shows the plywood that have been painted with black colour.
 |
| Figure 1: A surface of plywood that have been painted. |
Step 2
When the paint is completely dry, all the components will mounted on the painted plywood and arranged according to the project design. Below is the figure that shows the components that have been arranged and mounted on the plywood.
 |
| Figure 2: A few components that have been completed mounted on the painted plywood. |
Step 3
After all the components completed mounted on the plywood, each part of component will be wired according to the wiring diagram and the result is such as Figure 3 below.
 |
| Figure 3: Each part of electrical and electronic is wired separately. |
Step 4
Once all parts of electrical appliances is wired completely, a wiring job for the electronic part will be made. This part is made side by side to avoid any mistake in the wiring. Below is the figure that shows both parts of project that have been wired completely.
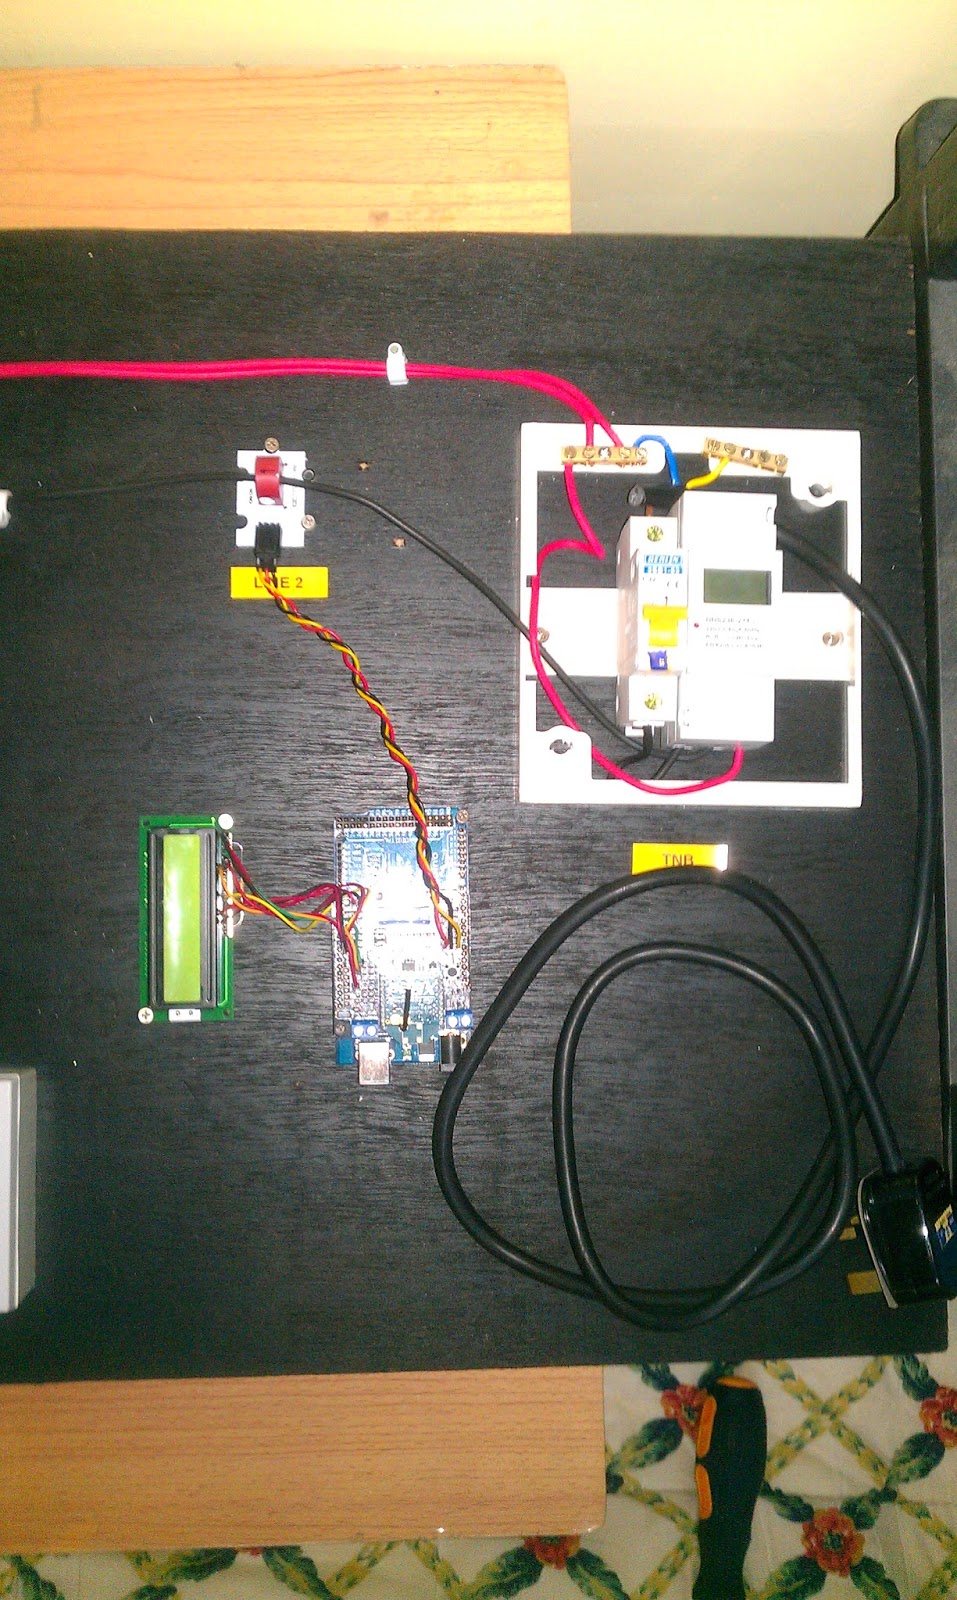 |
| Figure 4: This parts are referred as pole based systems and have been wired completely. |
 |
| Figure 5: This parts are referred as consumer based systems and have been wired completely. |
All parts of the hardware have been installed and wired based on the project design and wiring diagram that have been designed before. Thus, the results that obtained from this activities is such as the figure that shown in the Project Outcome below.
Project Outcome
 |
| Figure 6: The end result for the hardware development part. |
As a conclusion, all works done smoothly. Thus, for the other work that relate with the software development will be made in the next progress report.
No comments:
Post a Comment